-
How to do client side validation in Asp.Net MVC?
about 10 years ago
In this blog, we illustrate how to enable a client side validation in Asp.Net MVC.
Firstly we need to understand what is client side validation in Asp.net MVC.
Client side validation:
All Client side validation is handled on the Web browser. Client side validation is used when we don't want to use any server resources to validate the user input requests. Client side validation uses a JavaScript Language to enable a web browser for validating a user input at client side it means the web browser must support the JavaScript Language.
Example for Client side validation:
-
Design a Model with name Users.cs
using System.ComponentModel.DataAnnotations;
namespace ClientValidation.Models
{
    public class Users
    {
        [Required]
        [StringLength(32)]
        public string FirstName { get; set; }

        [Required]
        [StringLength(32)]
        public string LastName { get; set; }

        [Required]
        [EmailAddress]
        public string EmailId { get; set; }


    }
}
2. Create the Controller for Student with name UsersController.cs. In this controller, we need to create two action method to handle a GET and a POST request.
using System.Web.Mvc;
using ClientValidation.Models;
namespace ClientValidation.Controllers
{

    public class UsersController : Controller
     {
         [HttpGet]
         public ActionResult Users()
           {
               Users model=new Users();
               return View(model);
            }
         [HttpPost]
          public ActionResult Users(Users model)
           {
             if (ModelState.IsValid)
              {
                TempData["FirstName"]= model.FirstName;
                TempData["LastName"] = model.LastName;
                TempData["EmailId"] = model.EmailId;
              }
              return View(model);
          }
      }
 }
3. Create a view (Users.cshtml) which binds the input fields with model
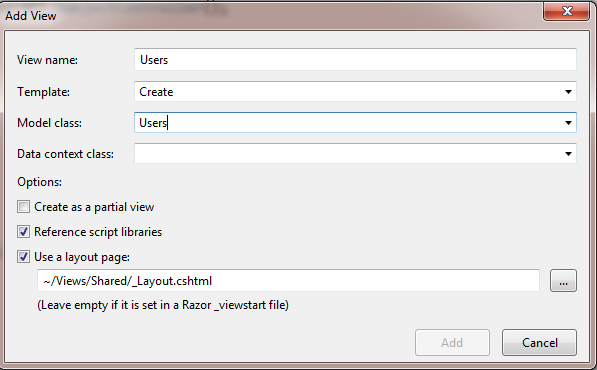
Fig: To Add a view
Below is the view (Users.cshtml)
@using (Html.BeginForm(new { @class = "form-horizontal", role = "form", id="form1" }))
 {
    <div class="form-group">
        @Html.LabelFor(m => m.FirstName, new { @class = "col-md-2 control-label" })
        <div class="col-md-10">
            @Html.TextBoxFor(m => m.FirstName, new { @class = "form-control" })
            @Html.ValidationMessageFor(m => m.FirstName, "", new { @class = "text-danger" })
        </div>
    </div>
    <div class="form-group">
        @Html.LabelFor(m => m.LastName, new { @class = "col-md-2 control-label" })
        <div class="col-md-10">
            @Html.TextBoxFor(m => m.LastName, new { @class = "form-control" })
            @Html.ValidationMessageFor(m => m.LastName, "", new { @class = "text-danger" })
        </div>
    </div>
    <div class="form-group">
        @Html.LabelFor(m => m.EmailId, new { @class = "col-md-2 control-label" })
        <div class="col-md-10">
            @Html.TextBoxFor(m => m.EmailId, new { @class = "form-control" })
            @Html.ValidationMessageFor(m => m.EmailId, "", new { @class = "text-danger" })
        </div>
    </div>
      <br />
    <div class="form-group">
        <div class="col-md-offset-2 col-md-10">
            <input type="submit" class="btn btn-default" value="Create" />
        </div>
    </div>
}
4. Add or Check the "Reference script libraries".
@section Scripts
      {
        @Scripts.Render("~/bundles/jqueryval")
       }
5. Add below following in view(Users.cshtml) to display the input fields value after click on the Create button.
model ClientValidation.Models.Users
@{
    ViewBag.Title = "Users";
 }
 @if (ViewData.ModelState.IsValid)
  {
    if (TempData["FirstName"] != null)
     {
        <div>
            <b>FirstName:</b>@TempData["FirstName"]<br />
            <b>LastName:</b> @TempData["LastName"]<br />
            <b>EmailId:</b>@TempData["EmailId"]
       </div>
     }
   }
Outputs:
1. If all the input fields are empty.
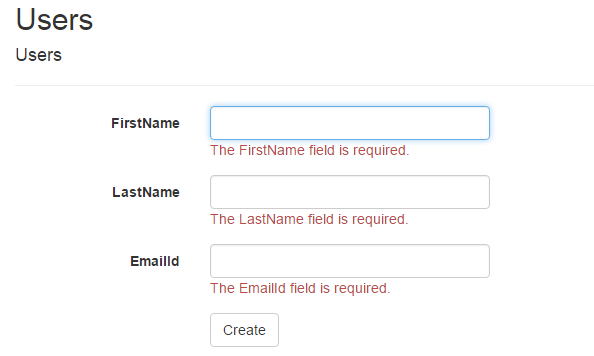
Fig: When all input fields are empty
2. If the FirstName and LastName input fields are empty but EmailId input field is not contain a valid EmailId.
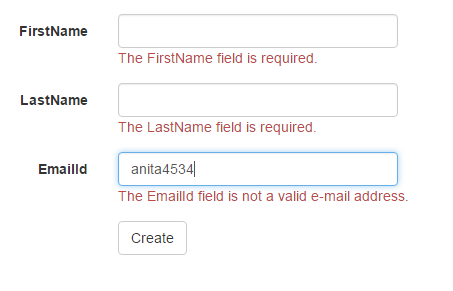
Fig:When FirstName and LastName input fields are empty but EmailId is not valid EmailId
3. If all the input fields contains valid data.
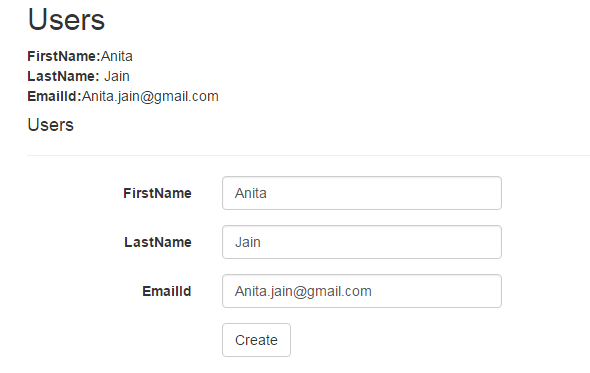
Fig:When all the input fields contains valid data
-


0 Comment(s)