"Find and Customize Keyboard shortcuts in Visual Studio"
As the use of shortcuts while development saves alot of time.
In this article we will see how we can identify and customize the keyboard shortcuts in Visual Studio.
Getting Started:
Step 1: Open the Visual Studio.
Step 2: Goto Tools and select Options
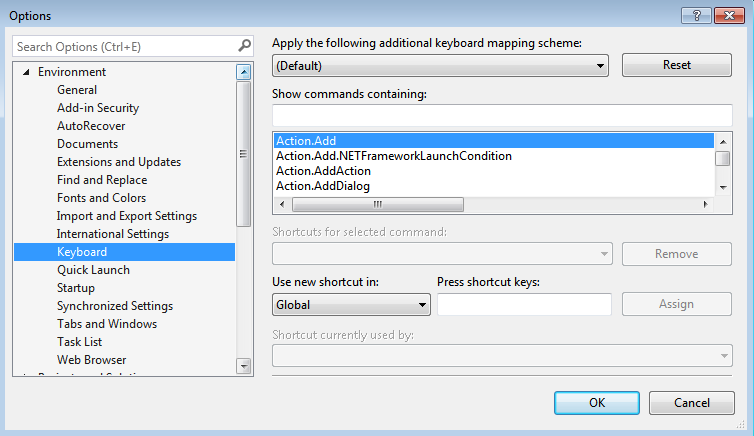
Step 3: On the left of the Pop-up window expand Environment and select Keyboard. The pop-up window looks like:

Step 4: Now on the right side of the pop-up window type the part of the name of the command or select it from the drop down.
For example:
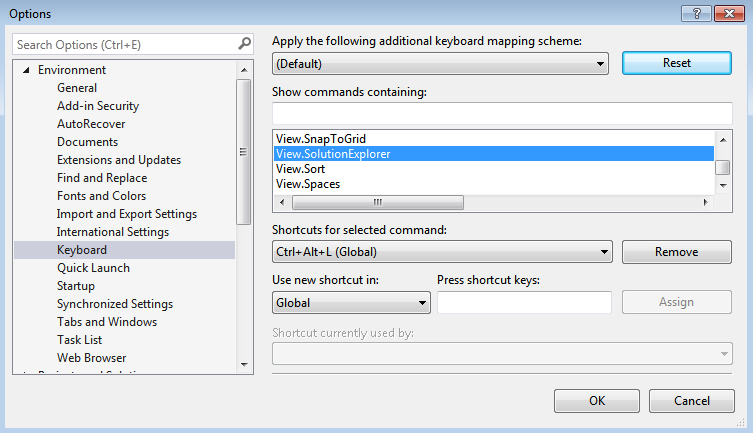
If we select the View.SolutionExplorer, the pop-up window will look like:

Step 5: If there already exists a shortcut for the selected Command it will appear in the Shortcut(s) for selected command area.
Customizing Shortcuts:
Now if you wan't to change the shortcut for that command then:
Repeat Step 1 to 5:
Step 6: Click Remove button inorder to remove the current shortcut for the command.
Step 7: Type the shortcut you wan't in the Press Shortcut Keys area and click Assign button.
Sharing the Shortcut List:
Now as the Shortcut for the selected Command is customized you can also share the customized list of shortcuts with others:
Step 1: Goto Tools and select Import and Export Settings.
Step 2: Select Export selected environment settings and then click the Next button.
Step 3: Expand Options under Under What settings do you want to export? and select Environment.
Step 4: Now check the Keyboard check box, and click the Next button.
Step 5: Now provide the Name and Path for your File and click the Finish button.
Now your file is ready, you can share it with someone, who can use those shortcuts by importing that file.
Hope it Helps.... Happy Coding..!
0 Comment(s)