Hello Readers,
This blog shows the basic custom module creation in Joomla.
In Joomla basically, we use the four basic files that used to develop the basic custom module in Joomla:
Step 1 : mod_mymodule.php - mod_mymodule is the first or entry file for the module. It is used to call the helper file to collect any necessary data and include the template which is used to display the module data.
Example code of mod_helloworld.php :
/**
 * My Module! Module Entry Point
 *
 * @package    Joomla.Tutorials
 * @subpackage Modules
 * @license    GNU/GPL, see LICENSE.php
 * @link       http://docs.joomla.org/J3.x:Creating_a_simple_module/Developing_a_Basic_Module
*/

// No direct access
defined('_JEXEC') or die;
// Include the syndicate functions only once

require_once dirname(__FILE__) . '/helper.php';

 $hello = modMyModuleHelper::getHello($params);
 require JModuleHelper::getLayoutPath('mod_mymodule');
The above code show:
1. helper file is used to collect the necessary data.
2. call the appropriate helper class method to retrieve the data.
3. Last we use the template to display or view the output or data.
Step 2 : helper.php - helper file contains the helper class which is used to display the collected necessary data in the module.
Example code of helper.php:
/**
 * Helper class for My Module! module
 *
 * @package    Joomla.Tutorials
 * @subpackage Modules
 * @link http://docs.joomla.org/J3.x:Creating_a_simple_module/Developing_a_Basic_Module
 * @license        GNU/GPL, see LICENSE.php
*/
class ModMyModuleHelper
{
    /**
     * Retrieves the hello message
     *
     * @param   array  $params An object containing the module parameters
     *
     * @access public
     */
    public static function getHello($params)
    {
        return 'Hello, World!';
    }
}
In the above code, we use the helper class and this helper class have one method called getHello(). And this method return the message Hello World.
Step 3 : mod_mymodule.xml - Below XML file show all the module description.
Example code of mod_mymodule.xml:
<?xml version="1.0" encoding="utf-8"?>
<extension type="module" version="3.1.0" client="site" method="upgrade">
    <name>Hello, World!</name>
    <author>Nishant</author>
    <version>1.0.0</version>
    <description>A simple Hello, World! module.</description>
    <files>
        <filename>mod_mymodule.xml</filename>
        <filename module="mod_mymodule">mod_mymodule.php</filename>
        <filename>index.html</filename>
        <filename>helper.php</filename>
        <filename>tmpl/default.php</filename>
        <filename>tmpl/index.html</filename>
    </files>
    <config>
    </config>
</extension>
The above code, show the module information and it's name,version,author etc and also show the files.
Step 4 : tmpl/default.php - This default file contains the view or template of the module and this file collected the data by mod_mymodule.php and display on the page.
Example code of default.php :
/**
* @package Joomla.Site
* @subpackage mod_mymodule
* @copyright Copyright (C) 2005 - 2012 Open Source Matters, Inc. All rights reserved.
* @license GNU General Public License version 2 or later; see LICENSE.txt
*/
defined('_JEXEC') or die;
<p>Hello World!!!!!!</p>
The above code, show the html Hello World.
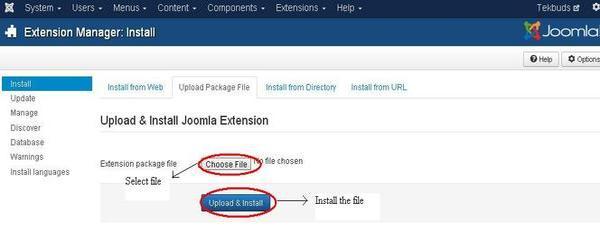
Step 5 : After creating these files compress the mod_mymodule folder and install from the admin section in joomla.

Step 6 : After uploading the module zip file then go to the Module Manager (Extension->Module Manager) and click on new created module and published.
0 Comment(s)