In this article, I’ll share 7 easy steps to use multiple targets and macro for handling the multiple environments.
Different environments are created to separate various parameters like Server URL, Bundle ID, API keys, etc. for the development and production app. As we use testing Server URL, API keys at the development phase and before submitting it to App store we need to modify its value for the production environment. Instead of changing the values, it’s better to handle both development and production environment with different values
Let’s start with creating multiple target!
1) To create new target , under target section right click on existing target and duplicate it.
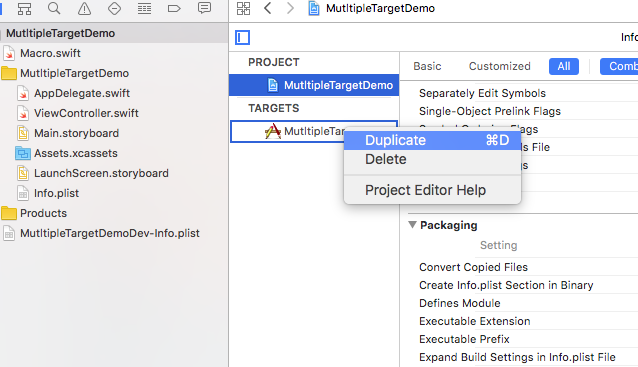
2) New target with name i.e“MultipleTargetDemo copy” is created.
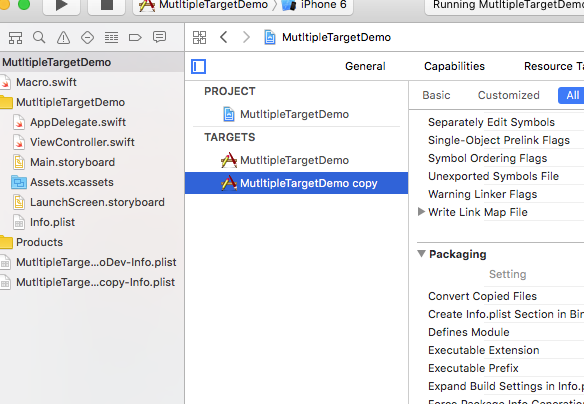
3) Press enter and change its name accordingly. As we are creating it for the development environment, I have renamed it as “MultipleTargetDemoDev”. Then, go to the Manage Scheme to select your scheme. Press the enter and rename it.
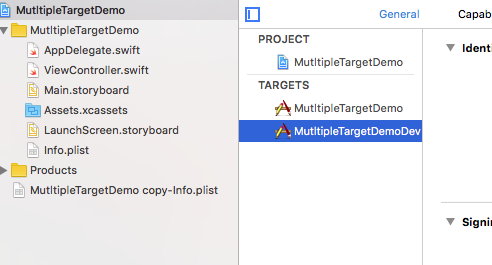
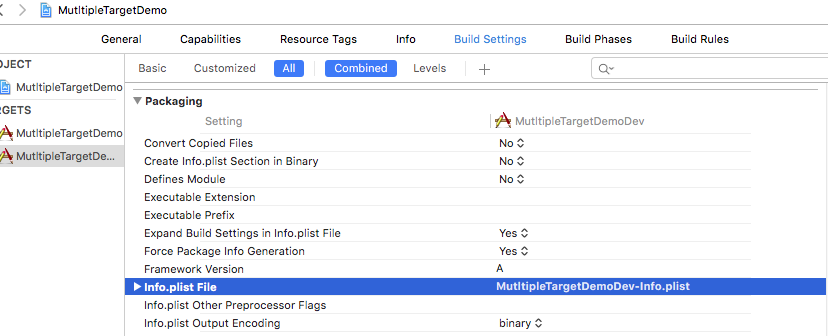
4) For new target, Xcode will automatically generate a plist . Goto Build Setting -> Packaging and rename you info.plist (i.e MultipleTargetDemoDev-info.plist)
5) After creating new target go to Build Settings -> Swift Complier-Custom Flags and add -DDEVELOPMENT on Other Swift Flags for development environment
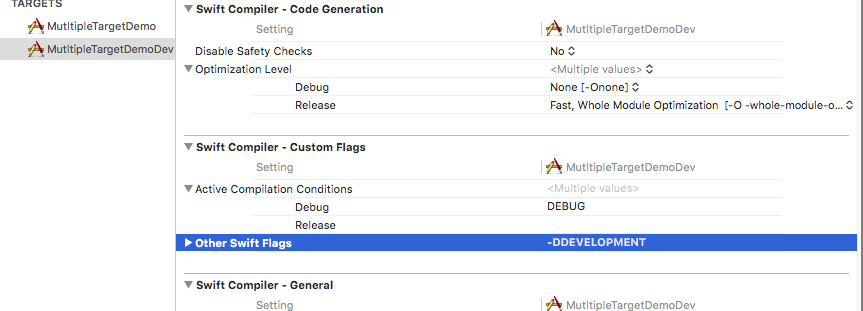
6) Create a Macro, here I’m adding different Server URL for development and production
#if DEVELOPMENT
let SERVER_URL = "DEV_SERVER_URL"

#else
let SERVER_URL = "PROD_SERVER_URL"
#endif
7) Now run your project with MultipleTargetDemoDev scheme, it will automatically set your SERVER_URL to “DEV_SERVER_URL” and for other scheme your SERVER_URL will be “PROD_SERVER_URL.
Well, this was fun. Isn’t it? I would love to hear from you. Please share your thoughts and opinions in the comment section below.
0 Comment(s)