This blog is part of 1 Tute Sets.
Digital Marketing Blogs
Tute set by manoj.rawat
8 Blogs-
1
Digital Marketing: Remarketing vs Retargeting Strategy
by manoj.rawat
-
2
How to Send e-mail Newsletter as Per Recipient's Time Zone
by manoj.rawat
-
3
How to Create Banner Ads on Doubleclick for Publishers
by manoj.rawat
-
4
Quality Control Routine for Advertising Materials Before Publishing
by manoj.rawat
-
5
eBooks : Part of Modern Lifestyle
by manoj.rawat
-
How to Create Banner Ads on Doubleclick for Publishers
over 10 years ago

Doubleclick for Publishers an Intro
We use different type of techniques for internet marketing to promote the content and drive traffic towards a website or blog. Apart from several other available internet marketing options Google also provide DFP which is basically known Doubleclick for Publishers. Google provide this service in two possible options one DFP for small business which is free and other as a paid service with advanced features.
Here are some basic details of DFP for small business:
- Doubleclick for Publisher(DFP) is an Ad service from Google for Small Business. It is freely hosted ad service that provides various features which are very useful for managing and processing of online advertisements.
- To access its features, we need to integrate it with a website to show Ads.
- Free Ads service has a limited quota of Ad impressions per month for an account.
- Client Ads (JPEG or PNG format) can be promoted on website for certain set of Ad impressions per month.
- Each Ad is associated with a landing page URL that can be set up on DFP account for a certain time period.
- DFP account also provide monitoring of all stats including the no. of impressions, Click on ads, etc.
Creating Banner Ads on DFP
Banner Ads creation on DFP require few steps, here are some steps to follow to create banner ads:
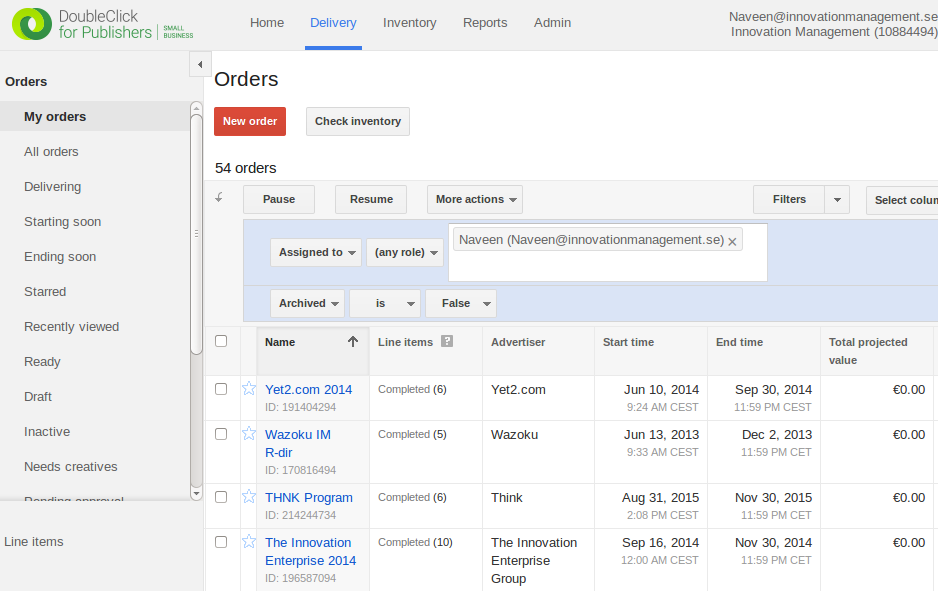
Step 1: Visit DFP link, click My Order to the left navigation menu and then create new order by clicking the New Order button.
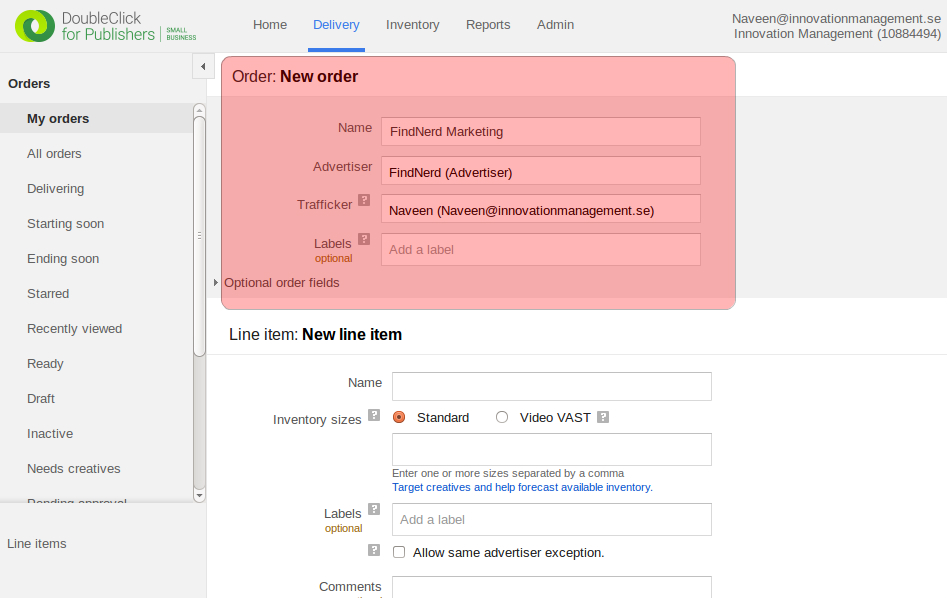
Step 2: Fill details for creating new order.
Step 3: Once your order is created, you can see New Line Item below that which can be used to create a new banner ad by filling the following details mentioned below:
- Name of banner ad: For example ABC for December Month.
- Inventory size: It can be (728x90, 468x60, 320x50, 234x60 for Leader Board A1 Position and 300x250 for Medium Rectangle B1, B3 position and 160x600 for Medium Rectangle B2 position).
- Type of banner: Standard, Network, Price, etc.
- Duration of Ad: Start and End Time.
- Quantity: No. of ad impressions scheduled.
- Ad Position: Choose the ad position either A1 or A2 for leaderboard and B1, B2 or B3 for Medium rectangle.
Step 4: Upload banner ad images in .png, .jgp, .gif format by Drag and drop feature, add the destination URL link to your ad and then press save button.
And you have successfully created a banner ad that will start displaying on the website associated with DFP account.


0 Comment(s)