-
Paint over a color with the Color Replacement tool
over 10 years ago
It is obvious that most of the time we find unwanted object color in our image, not matching with other color or you have to change it for some reason, now the question is how we are going to change the color with a desired color to match.
Things I want to share with you about an interesting tool in Photoshop that is Color Replacement Tool and how it gives us the freedom to change color of any object with ease and comfort, though its not the the most effective way to change the color as some times results may vary but then yes it's easy to use and good for beginners.
Introduced in Photoshop CS for the first time, you can find Color Replacement Tool under brush tool in tool bar.

When Color Replacement Tool is selected your cursor will turn into a circle with the target symbol in the center, you can adjust the size, hardness, softness of the edges accordingly.

How it Works As you drag the cursor over the image, Photoshop picks the color what is under the target symbol and start replacing it with the selected Foreground color, pixels that come in contact with large circle, will be replaced with the selected foreground color.

Example
This example shows the image before and after use of Color Replacement Tool

Options
There are few options available to adjust the behavior of the Color Replacement Tool: Tolerance, Blending Mode, Sampling, Limits, Anti Alias

- Tolerance: Tolerance is used to control a difference of a sampled color for Photoshop which will be replaced with the foreground color.
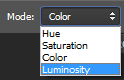
- Blend Modes: Color Replacement Tool uses blend modes to blend the new color in with the image. These blend modes to choose from (Hue, Saturation, Color, and Luminosity) these can be selected from the mode option, Color is the default blend mode.
Hue: It changes only the basic color It will not change the saturation or brightness of the original color. This is useful for very intense color in the image.
Saturation: It changes only the saturation of the original color. The hue and brightness are not affected. This reduces the intensity of a color, or it can completely remove the color.
Color: It changes both the hue and saturation. The brightness will remain same. This is the most used mode is also a default mode.
Luminosity: It matches the brightness of the original color to the brightness of the new color. Hue and saturation will remain same.
- Sampling: There are thee options under sampling Continuous, Once, Background Swatches
Continuous is by default selected option it continuously replaces the color as the target symbol passes over till you drag the Color Replacement Tool.
Once: It will only sample the color you initially click as long as you hold the mouse button.
Background Swatch: It replace the currently set color as selected background color.
- Limits: Three sub options falls under limits Contiguous, Discontiguous, Find Edges. Contiguous is the default it changes the area which the target sample is touching. Discontiguous is just opposite of contiguous. Find Edges changes the connected area while keeping the sharpness of the edges same.

- Anti-Alias- By default selected this smooths out the area affected by Color Replacement Tool.


0 Comment(s)