-
Implement Light Effect in Photoshop CC using HDR Toning Feature - 5 Step Guide
over 7 years ago
An HDR image contains the dynamic range of the scene. Basically HDR image is set of merged exposures. High dynamic range (HDR) images represent the entire dynamic range of the visible world. HDR Toning containing the Presets when you select any preset it's automatically set the exposure, shadow & highlights.
HDR image are stored using a floating-point numeric representation that’s 32 bits long (32bits-per-channel). 32-bit HDR image features a greater dynamic range than a 16-bit. HDR images are created when you merged different photograph at different exposures. If you want to print that images or use filter on it that don't work with HDR Image. you can also convert them to 16- or 8bpc images.
So, In this tutorial we are going to learn about HDR toning feature and light effect in Photoshop CC, for that we will create a lighting in the image of forest.
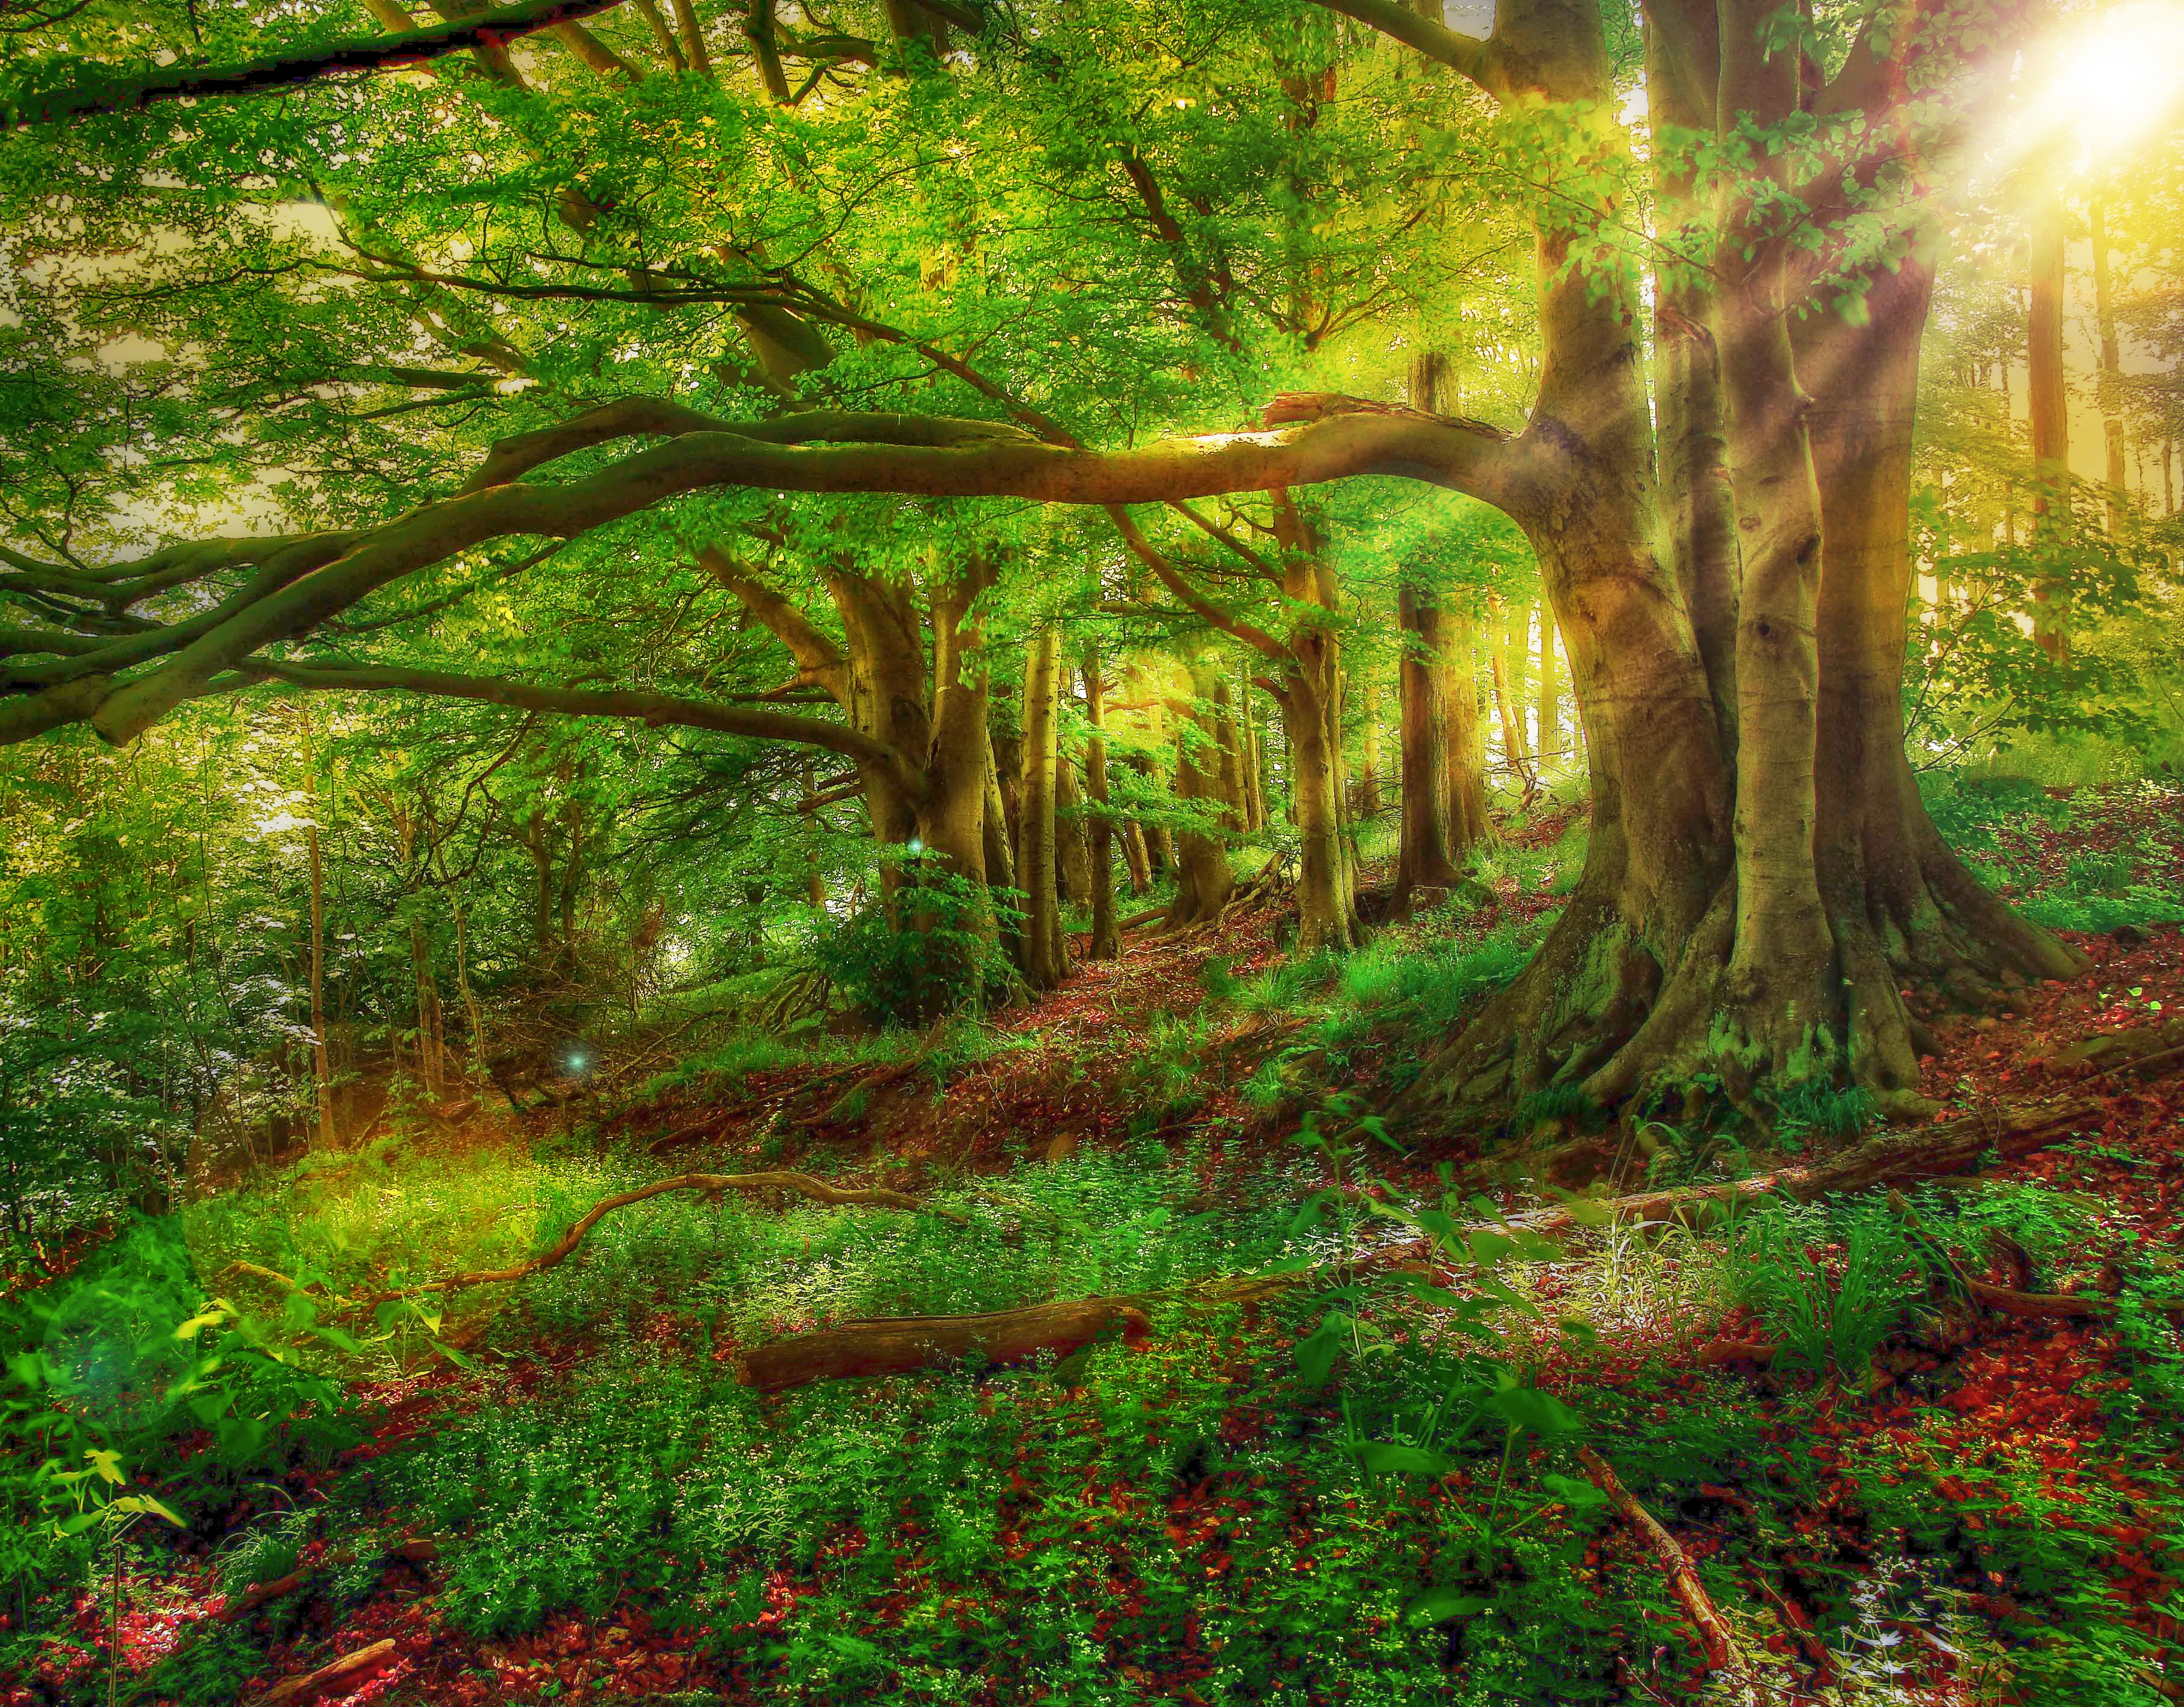
Here we can see the before image of forest.
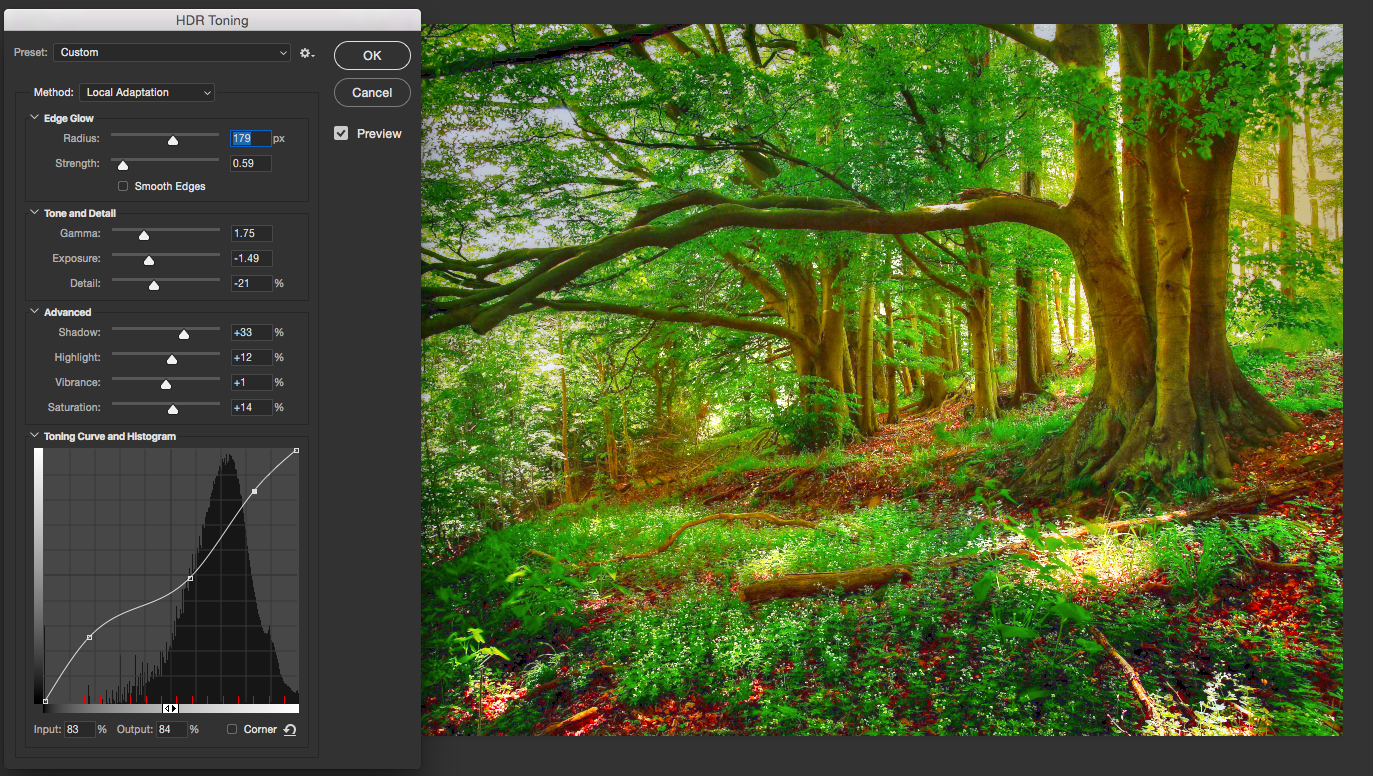
Step 1. First, you need to download the forest image and open up in photoshop. Now we can go to HDR toning dialog box ( Image > Adjust > HDR Toning ).
Here is the following settings for HDR Toning.
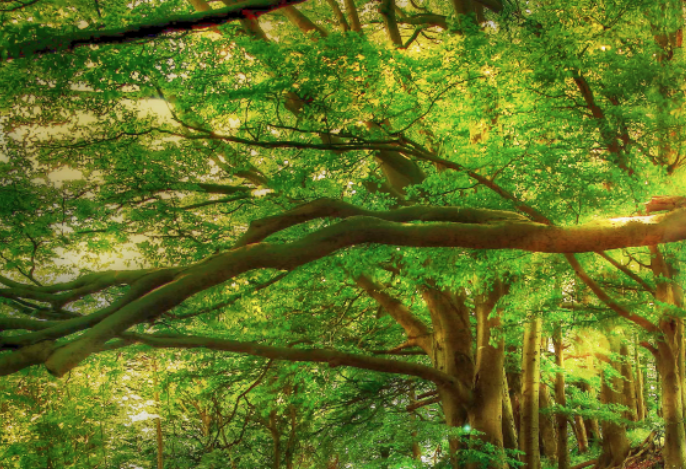
Step 2: Now we need to show some lighting effects. So, on the Images we are using light yellow and orange color and applied the brushes on a new layer with blending mode set to overlay.
Step 3: If you want to better lighting effect on the image. We need to show the light on leaves and bushes as well. Apply the brushes on it with light yellow color to enhance the lighting.
Step 4: Now let’s add some sunlight on leaves and bushes. We can choose a small soft white brush and make a straight line with holding shift key on the new layer.
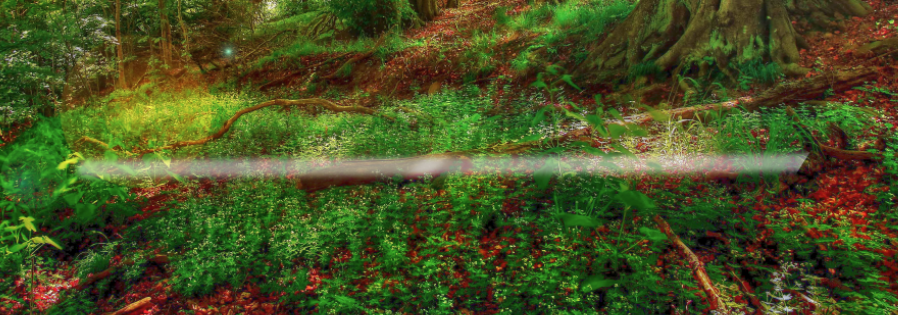
Now Rotate it diagonally from top right corner. Apply the blending mode to overlay and reduce the opacity to 50%. Erase some rays from tree its look like some of the rays are coming behind the trees.
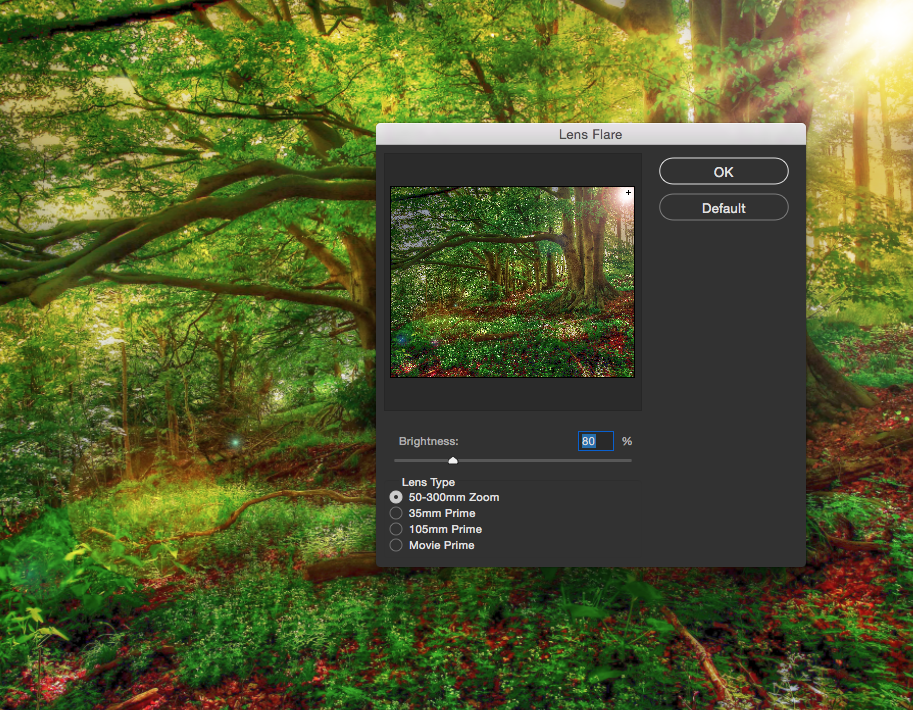
Step 5: Now time to add the Lens flare at the top right corner where sunlight is coming. Goto Filter > Render > Lens Flare and applied on it. It help you to enhance the lighting of sunlight.
Here is the settings for lens flare.
Here is the procedure to create a Lighting by using HDR toning and Lens flare.


0 Comment(s)