-
How to create tasks in PIM
about 9 years ago
Hello
This blog post gives a brief overview of tasks in PIM. It also illustrates the steps to create, sort and accept tasks.
Tasks
The tasks that are created manually or by a workflow are represented in a tree structure. These are displayed in the Tasks view. The tree is divided into three main nodes. These are:
- My tasks: List of all accepted tasks
- Tasks not accepted: Tasks that have been assigned to user or to user group but not yet been accepted.
- Responsibility: Tasks for which one user is responsible but they are being processed by other users.
Creating tasks
There are two ways to create a new task:
- Create a blank task and then use drag and drop to add items and products to the task
- Select the relevant items and products first and then create the tasks within their context.
The steps to create new empty tasks are as follows:
- Select the "My tasks" node in the Tasks view.
- Click on the plus sign in the Views menu.
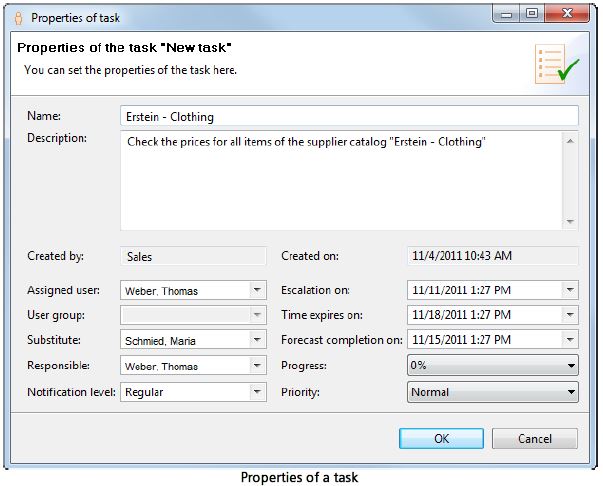
- Provide a name for the task.
- Specify values for assigned user, the assigned user's delegate and the person responsible.
- Enter an escalation date and an expiry date.
- Specify the priority of the task.
- Set the notification level.
- Click OK to save the task.
To assign items to the newly created task use drag & drop.
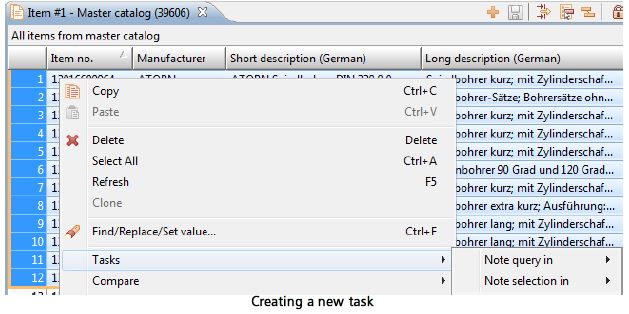
Steps to create task after assigning items and products are mentioned below:
- Perform a search
- Select the items in the Item #1 view .
- Select Tasks > Note selection in or Tasks > Note query in the pop-up menu.
- Specify to create a task or task group or user can also select an existing task group.
- Provide the details like name, description, assigned user, a deputy for that person and the person responsible for the task. The task can be assigned either to a processor or a user group. Specify the name and description for the new task group.
- Select the setting required for this task from the notification levels .
- Specify a deadline and an escalation date for tasks.
- Click on OK.
If an escalation date is less than 24 hours in the future, the task is highlighted in yellow in the view. If the task is not yet completed when the escalation date is reached, it is assigned to the specified deputy. Tasks for which both the escalation date and the deadline have passed are assigned to the person responsible and shown in red in the view.
The new task created is displayed to the assigned user under the "Tasks not accepted" node and to the person responsible under the "Responsibility" node. For a task group, a new task group is created containing the associated task.
Accepting tasks
The procedure for accepting a task is as follows:
- Select the task.
- Select Accept in the pop-up menu or click on the tick symbol. The task is displayed under the "My tasks" node.
The task can only be executed after it has been accepted.
Sorting tasks
Steps to change the sequence of tasks:
- Select a task in the Task s view.
- Click on upward arrow to move the task up, or on downward arrow to move the task down.
- The position of the task is moved up or down by one in the task group.


0 Comment(s)