-
How to Create RESTful API using NodeJS & MongoDB
about 8 years ago
So the first question will come in your mind is, What is REST?
Well, REST is an abbreviation for “representational state transfer”. It is an architectural style and also can be defined as an approach to communication that is used in web services development. It is more advisable to use REST instead of SOAP (Simple Object Access Protocol) because SOAP is heavyweight and it leverages more bandwidth than REST.
A RESTful API uses HTTP verbs to GET, PUT, POST and DELETE data. In other words, RESTful apps use HTTP requests to perform CRUD (Create, Read, Update and Delete) operations. GET is used to read data, POST is used for CREATE and UPDATE data and DELETE for remove data.
In this tutorial, we will learn how to create a RESTful API using NodeJS MongoDB. Make sure you have NodeJs and MongoDB installed in your system.
Required tools:
- NodeJS
- MongoDB
- A text editor.
- Postman (An HTTP client for testing web services)
Now, Let us see how to create a RESTful studentInfo API, The steps are as followed:
1. Create a directory named studentinfo.
2. Navigate inside studentInfo and create a package.json (use npm init to create it)
3. Install node dependencies using the command:
npm install express --save4. Now create a file and save it as server.js.
5. Open the server.js and write the following code:
var express = require('express');
var app = express();
app.get( '/' , function(req,res){
res.send("Congratulation you app is running");
});
app.listen(3000);
let me break down the above code explanation for you:
- In the first line, we are importing the express module. require() function is provided by NodeJS Which load modules and give you access to their exports. Then in next line, we put the new express application inside the app variable. We use the app to define endpoints for our application.
- In next line, we use get method to define a route and it’s handler. The first argument, ‘ / ’ is the endpoint and the other one is route handler. In the last line, we tell our server to listen on port 3000.
6. Run server.js by typing the command in cmd:
node server.js7. Type in browser http://localhost:3000. You will see “Congratulation you app is running” message.
Now we need some more things to move further
8. Install mongoose by running command:
npm install --save mongooseMongoose is a wrapper around mongo.
9. Install the node-restful by command:
npm install node-restful --saveWhich is a library providing REST API with node and express. (visit https://github.com/baugarten/node-restful ).
10. Install body-parser by:
npm install body-parser --savebody-parser takeout the whole body portion of an incoming request stream and reveal it on req.body in a middleware. (visit https://www.npmjs.com/package/body-parser )
Now your package.json will look like this
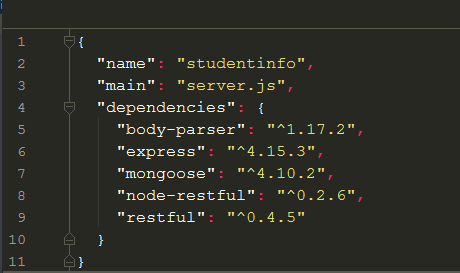
11. Now we require these modules and connect to mongoDB. For that write down the following code in server.js
var mongoose = require('mongoose');
mongoose.Promise = global.Promise; // if you don't include this you will get "DeprecationWarning".
mongoose.connect('mongodb://127.0.0.1:27017/studentinfo');
//make a schema using standard mongoose schema method
var Schema = mongoose.Schema;
var StudentSchema = new Schema({
    name: String,
    rollNumber: Number,
});
//now create the model using restful
var restful = require('node-restful');
var Students = restful.model('students', StudentSchema);
//define the methods and endpoint
Students.methods(['get','put','post','delete']);
Students.register(app, '/api/students');
12. Now our API is ready it will look like this
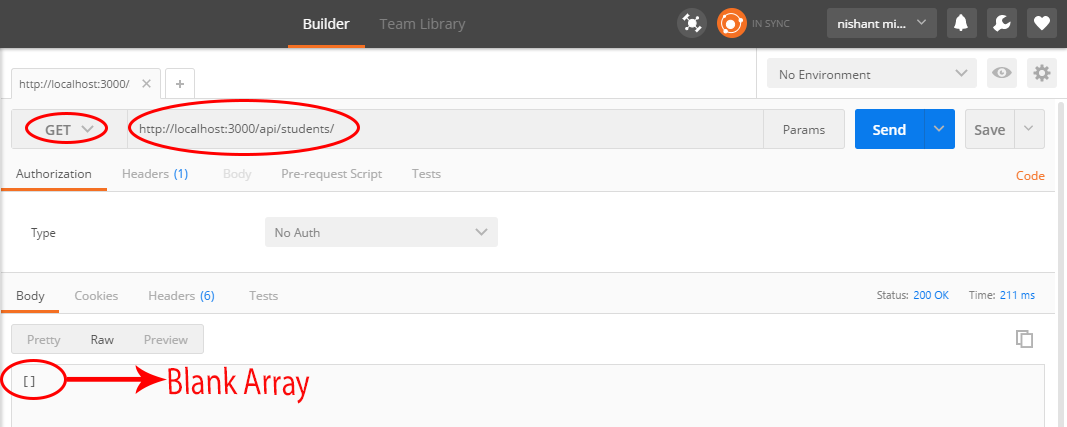
var express = require('express');
var restful = require('node-restful');
var bodyParser = require('body-parser');
var mongoose = require('mongoose');
mongoose.Promise = global.Promise;
var Schema = mongoose.Schema;

var app = express();

app.use(bodyParser.json());
app.get('/',function (req,res) {

    res.send("Go to localhost:3000/api/students");

})
mongoose.connect('mongodb://127.0.0.1:27017/studentinfo');
mongoose.connection.once('connected',function(){
    console.log("connected to database");
});
var StudentSchema = new Schema({
    name: String,
    rollNumber: Number,
});
var Students = restful.model('students', StudentSchema);
Students.methods(['get','put','post','delete']);
Students.register(app, '/api/students');

app.listen(3000, function () {
    console.log("server is listening on port:3000");
});
I have used postman for testing the http request. See the screenshot below for GET, POST, PUT, Delete:
- GET ( it will return an empty array because there is not data in database).
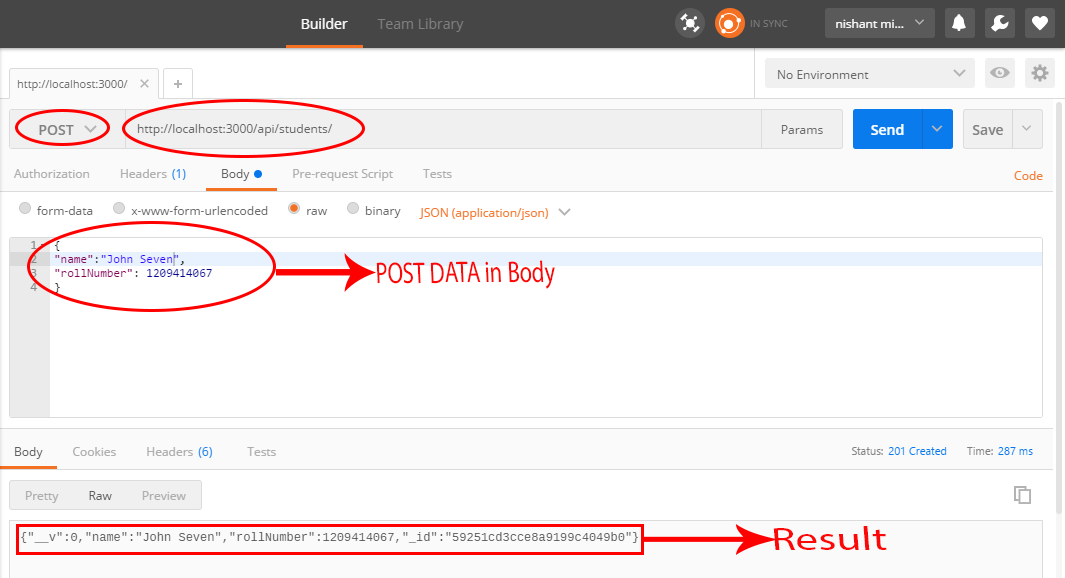
- POST (it will create an entry in database).
- PUT ( you have to send the id in the url to update).

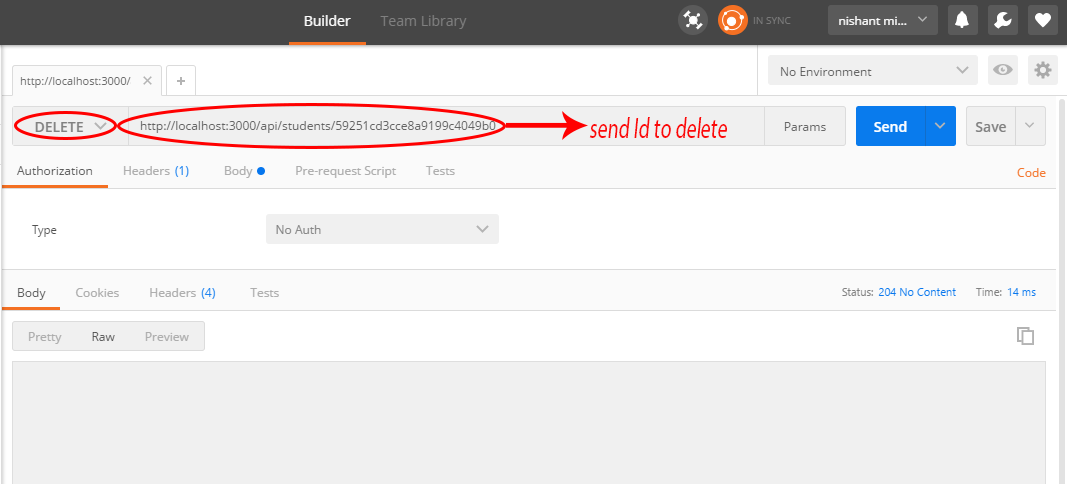
- DELETE ( send id in url to delete).
That is all you have to do to create NodeJS MongoDB Rest API. How did you find the article? Feel free to share your thoughts and concerns in the comments section below.


0 Comment(s)