-
Getting started with Hello World App in Windows Phone 8.1
over 8 years ago
So friends you are thinking to start with Windows Phone App development, but can't decide where to start from. No worries, let's get started with a simple application to give you some familiarity with the Windows Phone development environment.
Following article assumes that you are fulfilling the minimum requirements as follows:
- System running Windows 8.1 (x64) Professional Edition or higher to support Windows Phone emulators.
- The minimum required development environment could be Visual Studio 2013 (Update 2 or later) or Visual Studio Express 2013 which includes Update 2 RC.
- Windows Phone 8.1 Emulators package.
- Processor configuration: 1.6 GHz or faster.
- At least 4GB of disk space.
In the following introductory level blog, you'll find me using Visual Studio Community 2015.
Let's start with creating a new project
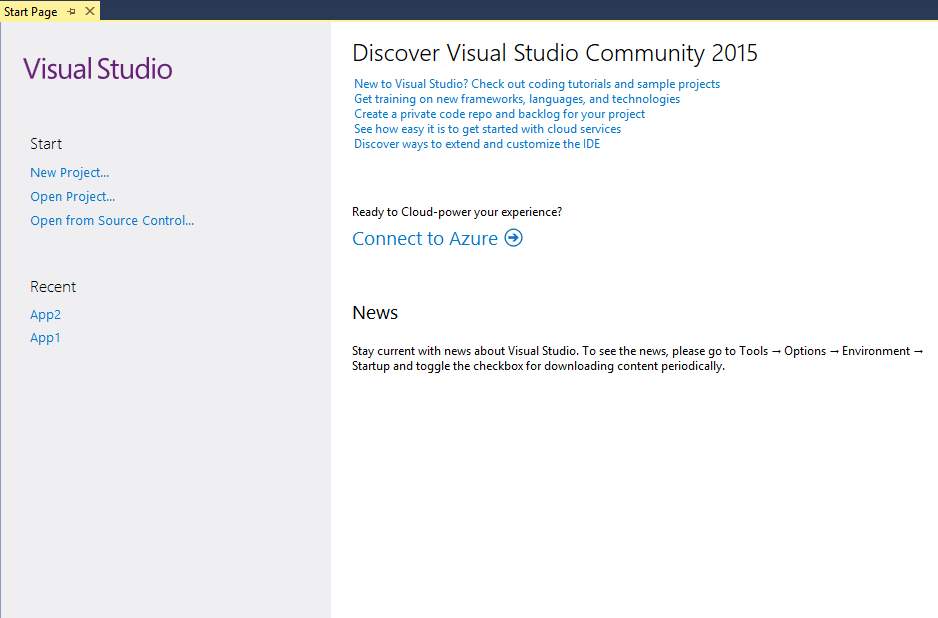
First open Visual Studio, then you can see the picture below.
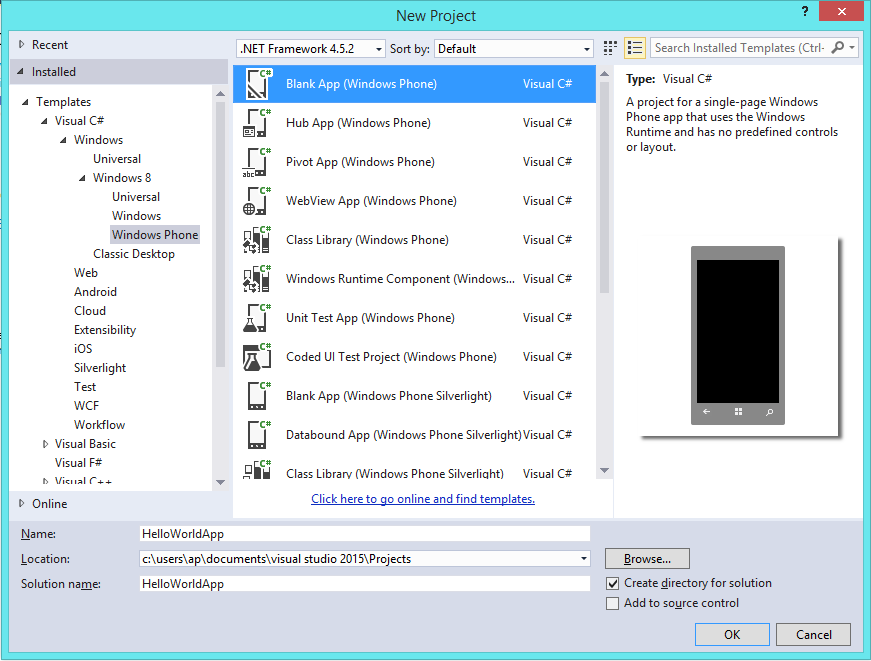
Click on "New Project" and go through selection Templates > Visual C# > Windows > Windows 8 > Windows Phone, then select "Blank App (Windows Phone)" and give it a name as "HelloWorldApp" and hit "OK".
Working with XAML page
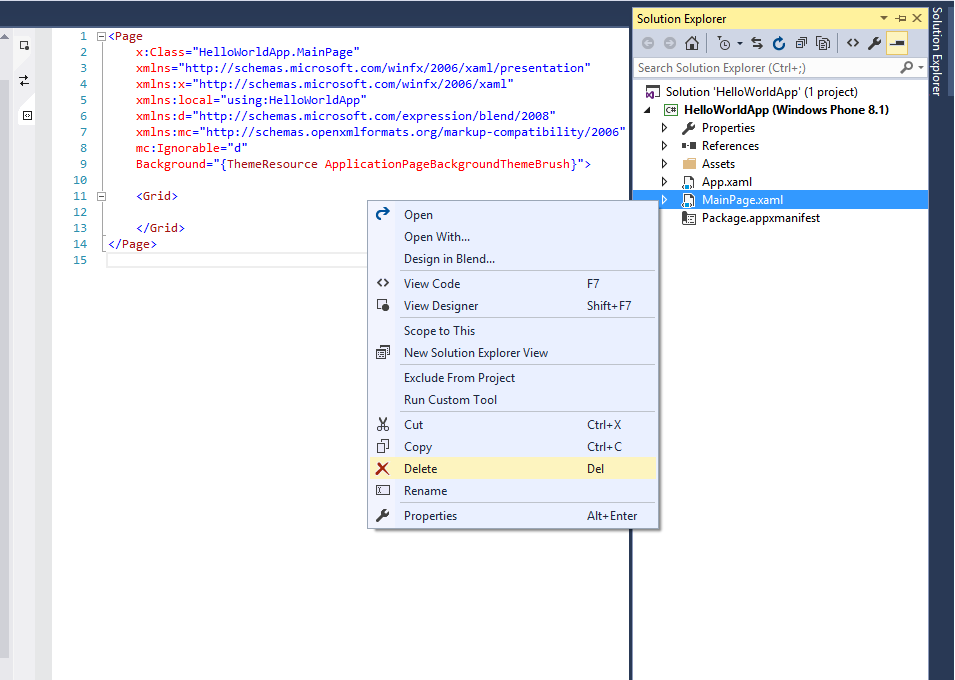
To begin with fresh xaml file, let's remove MainPage.xaml file from Solution Explorer. To delete this file right click on "MainPage.xaml" and choose "Delete" from context menu like in following image.
To add a new page, right click on project and follow selection as shown in figure below.
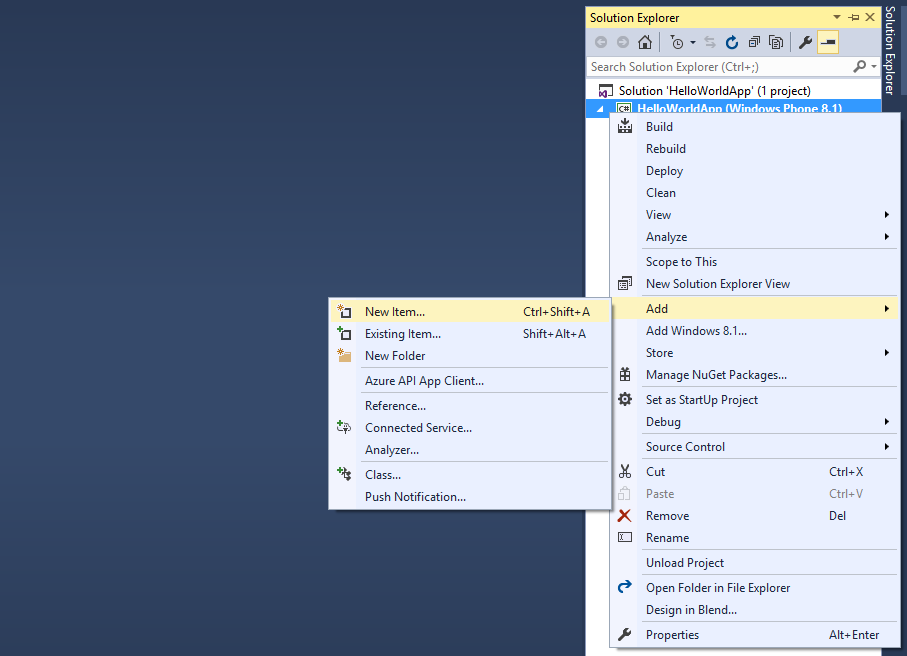
On choosing "New Item..." you will see following image. Select "Basic Page" from the options and name it as "MainPage.xaml".
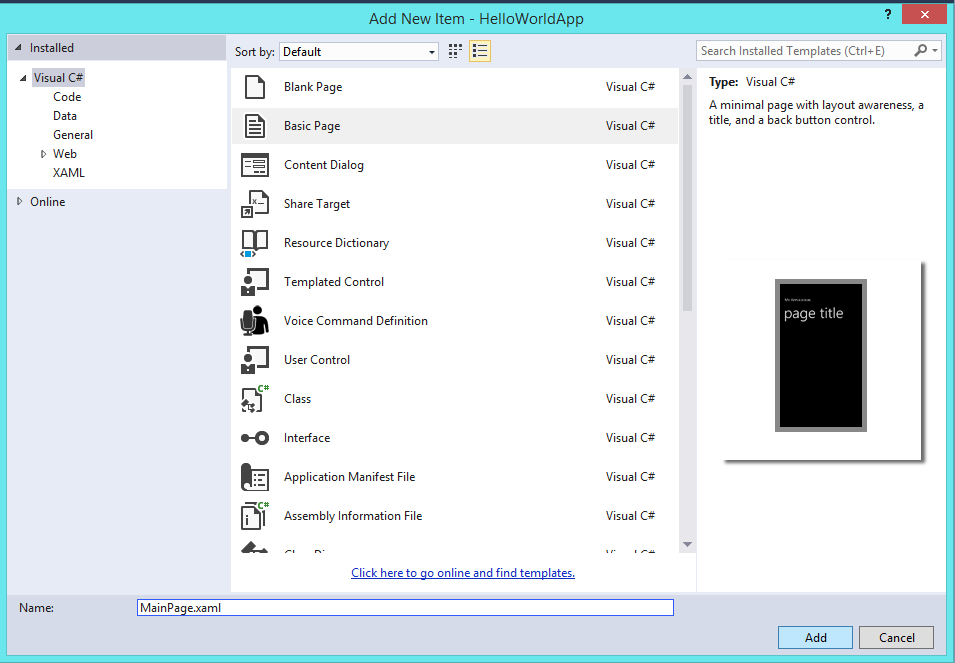
If you will see a pop up, select "Yes".

Modifying Title section
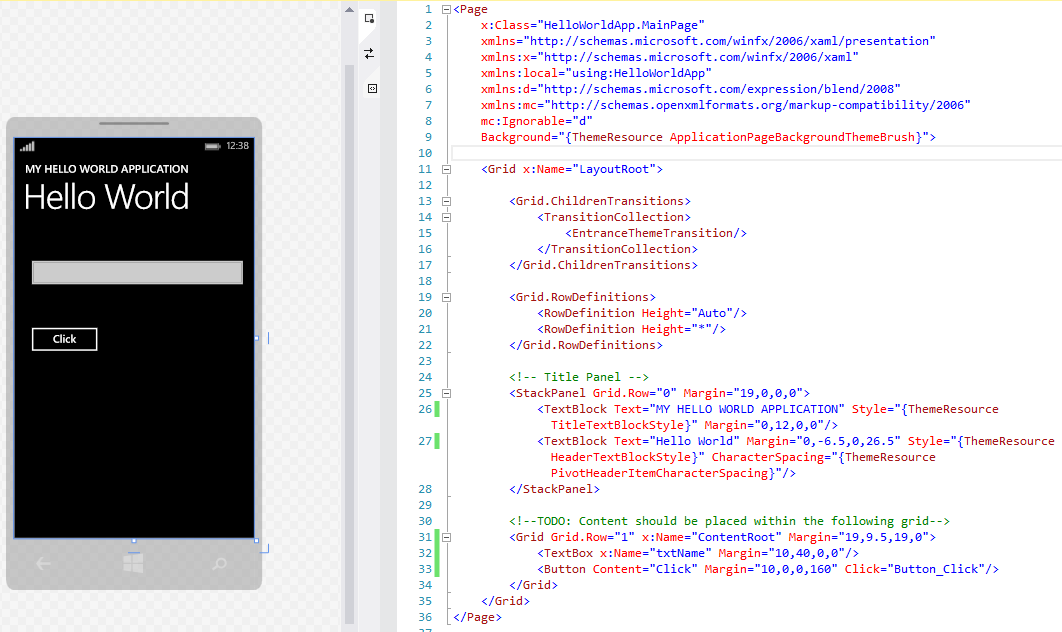
Just after you add new basic page "MainPage.xaml", it will get opened on your screen by default. Now let's modify title section marked with comment <!-- Title Panel --> in beginning. It is a placeholder for Application Name and Page Title.
<!-- Title Panel -->
<StackPanel Grid.Row="0" Margin="19,0,0,0">
    <TextBlock Text="MY HELLO WORLD APPLICATION" Style="{ThemeResource TitleTextBlockStyle}" Margin="0,12,0,0"/>
    <TextBlock Text="Hello World" Margin="0,-6.5,0,26.5" Style="{ThemeResource HeaderTextBlockStyle}" CharacterSpacing="{ThemeResource PivotHeaderItemCharacterSpacing}"/>
</StackPanel>
In the above xaml code, lines 3 and 4 are set with our application name as "MY HELLO WORLD APPLICATION" and page title as "Hello World".
Modifying main grid
Now we will modify content inside our main grid. Grid is a control that consists of rows and columns. It allows child elements to be placed inside it by assigning suitable row-column pair using Grid.Row and Grid.Column properties. For example, if we have placed a TextBlock control inside a Grid, and properties for that TextBlock are set as follows:
- Grid.Row = 1
- Grid.Column = 2
Here point 1 will position TextBlock inside Second Row of parent grid and point 2 will position TextBlock inside Third Column because indexing starts with 0. Now we will change the grid content which acts as content placeholder. Its marked with the following comment.
<!--TODO: Content should be placed within the following grid-->
Main grid section
<!--TODO: Content should be placed within the following grid-->
<Grid Grid.Row="1" x:Name="ContentRoot" Margin="19,9.5,19,0">
     <TextBox x:Name="txtName" Margin="10,40,0,0"/>
     <Button Content="Click" Margin="10,0,0,160" Click="Button_Click"/>
</Grid>
In the above xaml code, we have taken a TextBox that will allow user to enter any content. It has a property x:Name set to txtName which is used to fetch its value in the code behind file where we are going to write some logic. Our next Button control has a click event associated with it and a Content property which allows us to set text to be shown over it, we have set it to "Click".
Our design will look like as shown below.
Adding event handler for button
Now we are done with design, let's move to code behind file by pressing F7 or selecting "View Code" from context menu. In the above step while creating design you must have noticed that click event is set to "Button_Click" which is nothing but an event that will fire when we will click over our button.
Assuming that you have just pasted the xaml provided above and haven't generated Click event by other ways, paste the following code for click event of our button.
async private void Button_Click(object sender, RoutedEventArgs e)
{
      string message = "You entered, " + txtName.Text;
      MessageDialog msgbox = new MessageDialog(message);
      await msgbox.ShowAsync();
}
Here we are creating a message by concatenating "You entered, " text with the content entered in the textbox and then showing it in the dialog box. In the above code we are using MessageDialog class which requires the following using statement.
using Windows.UI.Popups;So we are ready with our first "Hello World" windows phone 8.1 app.
Run our application
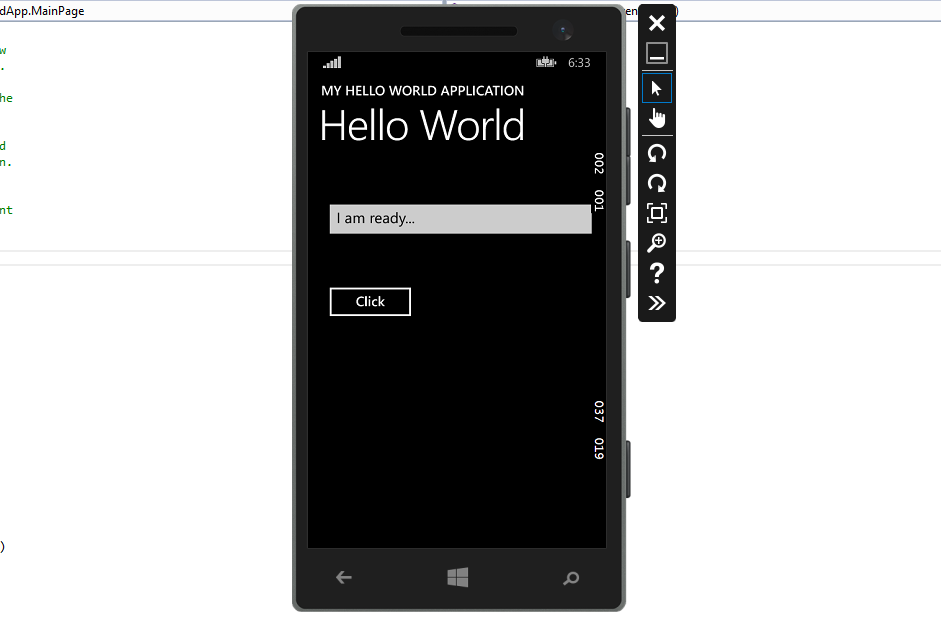
Press F5 or click on play icon in debug toolbar of our application and the emulator will pop up like below where I have entered text "I am here...".
Now press on "Click" button and it will shown an alert message as shown in image below.
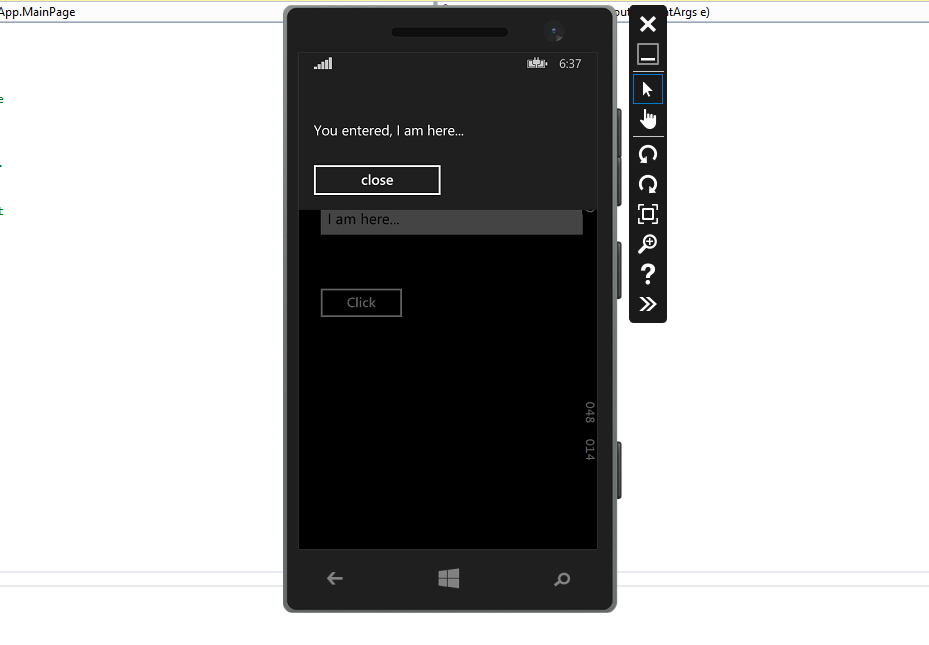
So we have successfully created our first windows phone 8.1 application.


0 Comment(s)