-
5 Steps iOS Tutorial to Create Repository in Bitbucket
almost 8 years ago
Bitbucket is a hosting service which is used to store source code of any application and code reviews. We can store source code of the application in bitbucket with the help of repository. The repository is used to store source code and any further modification in the application source code can be updated in the repository by committing that code to the particular repository.
If more than one developer is working on a single application, so it provides the feature of multiple commits with a push of source code to the server and source code pull feature is also available. Pull is to take the updated code from the repository and push to update the source code in the repository.
We need to create a repository for further working, so In this tutorial, I am providing the steps to create repository in bitbucket:
Step 1: Go to link https://bitbucket.org/ and login with your bitbucket credentials. If not registered please register first and then login.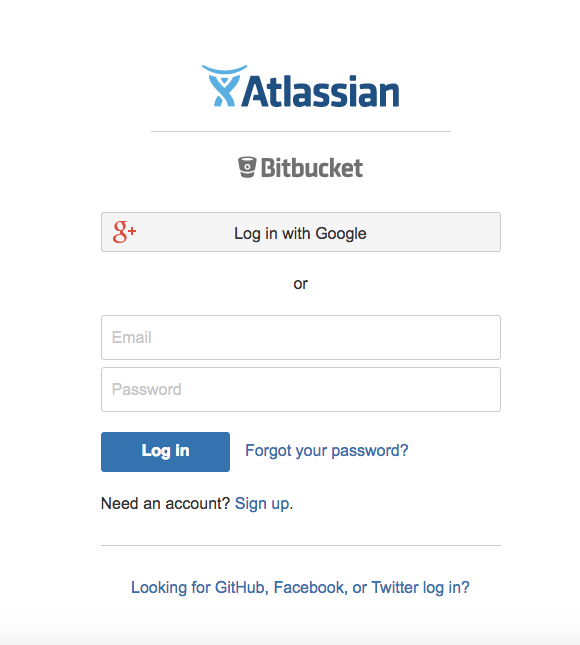
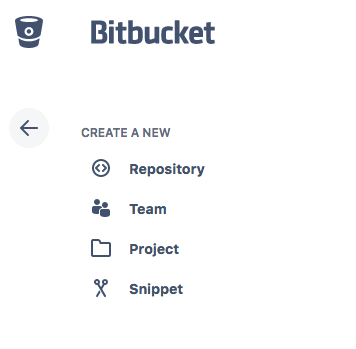
Step 2: After login click + icon on left side menu bar and select repository among the list.

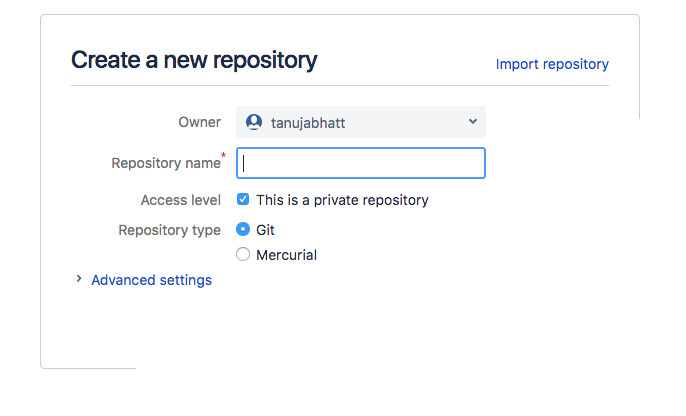
Step 3: Create a new repository page will come write down the name of your repository and click create repository button.
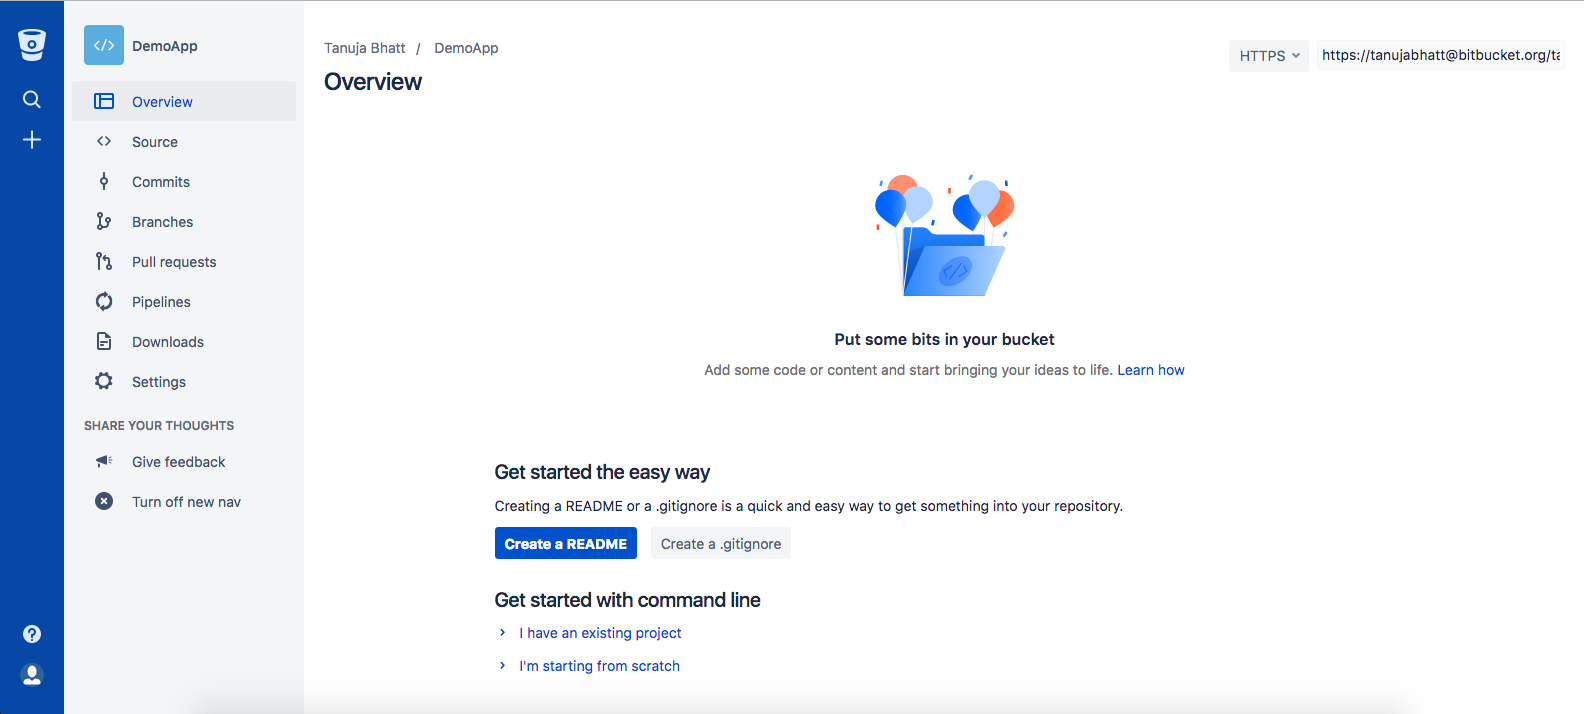
Step 4: After creation of repository it will redirect user to the new created repository with the mentioned name. As here name of repository is DemoApp so that is visible at the top of the screen on left hand side.
When you will see the above screen in bitbucket repository after that click on create a .gitignore file which redirect you to the screen given below:-
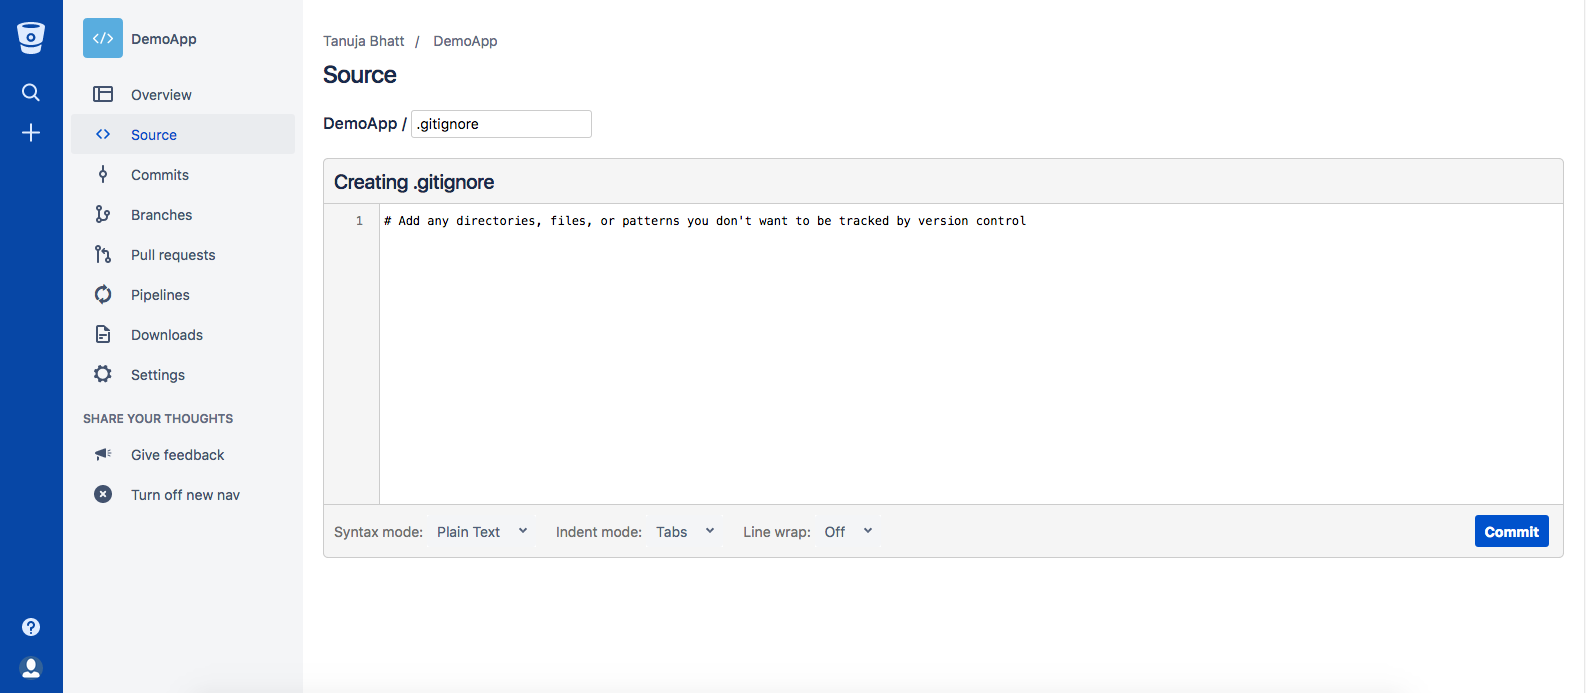
Now the below mentioned code you have to include in the space provided in above screenshot.
# Created by https://www.gitignore.io/api/xcode,swift,objective-c

### Objective-C ###
# Xcode
#
# gitignore contributors: remember to update Global/Xcode.gitignore, Objective-C.gitignore & Swift.gitignore

## Build generated
build/
DerivedData/

## Various settings
*.pbxuser
!default.pbxuser
*.mode1v3
!default.mode1v3
*.mode2v3
!default.mode2v3
*.perspectivev3
!default.perspectivev3
xcuserdata/

## Other
*.moved-aside
*.xccheckout
*.xcscmblueprint

## Obj-C/Swift specific
*.hmap
*.ipa
*.dSYM.zip
*.dSYM

# CocoaPods
#
# We recommend against adding the Pods directory to your .gitignore. However
# you should judge for yourself, the pros and cons are mentioned at:
# https://guides.cocoapods.org/using/using-cocoapods.html#should-i-check-the-pods-directory-into-source-control
#
# Pods/

# Carthage
#
# Add this line if you want to avoid checking in source code from Carthage dependencies.
# Carthage/Checkouts

Carthage/Build

# fastlane
#
# It is recommended to not store the screenshots in the git repo. Instead, use fastlane to re-generate the
# screenshots whenever they are needed.
# For more information about the recommended setup visit:
# https://docs.fastlane.tools/best-practices/source-control/#source-control

fastlane/report.xml
fastlane/Preview.html
fastlane/screenshots
fastlane/test_output

# Code Injection
#
# After new code Injection tools there's a generated folder /iOSInjectionProject
# https://github.com/johnno1962/injectionforxcode

iOSInjectionProject/

### Objective-C Patch ###

### Swift ###
# Xcode
#
# gitignore contributors: remember to update Global/Xcode.gitignore, Objective-C.gitignore & Swift.gitignore

## Build generated

## Various settings

## Other

## Obj-C/Swift specific

## Playgrounds
timeline.xctimeline
playground.xcworkspace

# Swift Package Manager
#
# Add this line if you want to avoid checking in source code from Swift Package Manager dependencies.
# Packages/
# Package.pins
.build/

# CocoaPods
#
# We recommend against adding the Pods directory to your .gitignore. However
# you should judge for yourself, the pros and cons are mentioned at:
# https://guides.cocoapods.org/using/using-cocoapods.html#should-i-check-the-pods-directory-into-source-control
#
# Pods/

# Carthage
#
# Add this line if you want to avoid checking in source code from Carthage dependencies.
# Carthage/Checkouts


# fastlane
#
# It is recommended to not store the screenshots in the git repo. Instead, use fastlane to re-generate the
# screenshots whenever they are needed.
# For more information about the recommended setup visit:
# https://docs.fastlane.tools/best-practices/source-control/#source-control


### Xcode ###
# Xcode
#
# gitignore contributors: remember to update Global/Xcode.gitignore, Objective-C.gitignore & Swift.gitignore

## Build generated

## Various settings

## Other

### Xcode Patch ###
*.xcodeproj/*
!*.xcodeproj/project.pbxproj
!*.xcodeproj/xcshareddata/
!*.xcworkspace/contents.xcworkspacedata
/*.gcno

# End of https://www.gitignore.io/api/xcode,swift,objective-c
Step 5: If you have an existing project you can easily add that project to your repository as given in below lines:-
- Go to menu of Xcode -> Source Control
- Tap on working copies and tap done
- Go to source control menu again and click on project name menu item -> configure with the repository URL and done.
- After making some changes commit and you will see that changes will reflect in the repository.
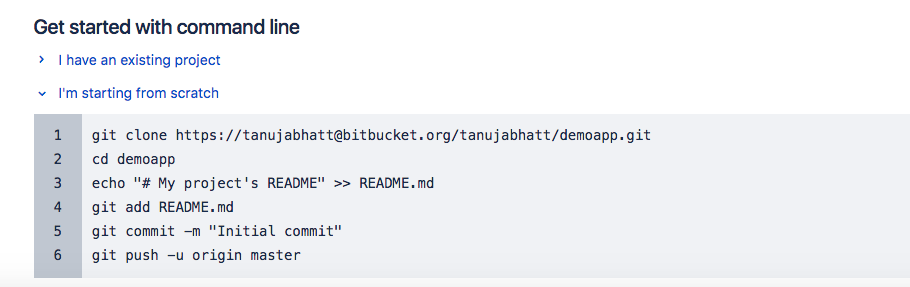
- If you are starting from scratch then just click on I’m starting from scratch and you will redirect to the screen where you will be able to add new files as per the need. Check the given below screenshot for creating project from scratch.


0 Comment(s)